
There’s a new model on the scene, and you’ve probably heard the buzz. DeepSeek-R1, developed by the Chinese AI company DeepSeek, has been compared to OpenAI's top models. The excitement around this new player goes beyond capabilities, however – it’s also about ease of use. Because it’s open source, anyone can download and run it locally. In this blog, I'll guide you through setting up DeepSeek-R1 on your machine using Ollama.
Why DeepSeek-R1?
DeepSeek-R1 stands out for several reasons. Not only is it cheaper than many other models, but it also excels in problem-solving, reasoning and coding. Its built-in chain of thought reasoning enhances its efficiency, making it a strong contender against other models. Let's dive into how to run this model on your local system.
Getting started with Ollama

Before we begin, let's discuss Ollama. Ollama is a free, open-source tool that allows users to run Natural Language Processing models locally. With Ollama, you can easily download and run the DeepSeek-R1 model.
Here's how you can get started:
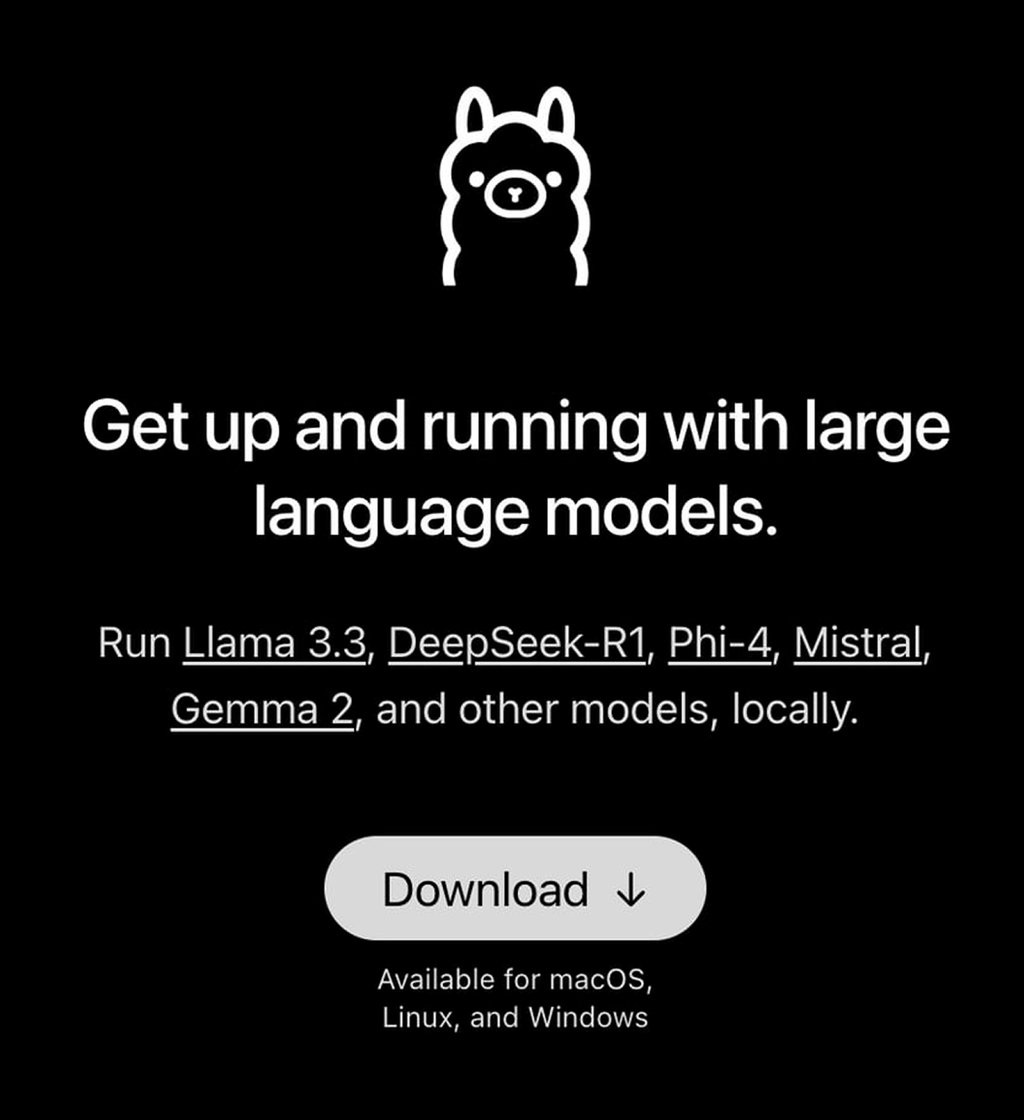
Step 1: Install Ollama
First, you'll need to download and install Ollama. Visit the Ollama website and download the version that matches your operating system. Then follow the installation instructions provided on the site.
Step 2: Download DeepSeek-R1
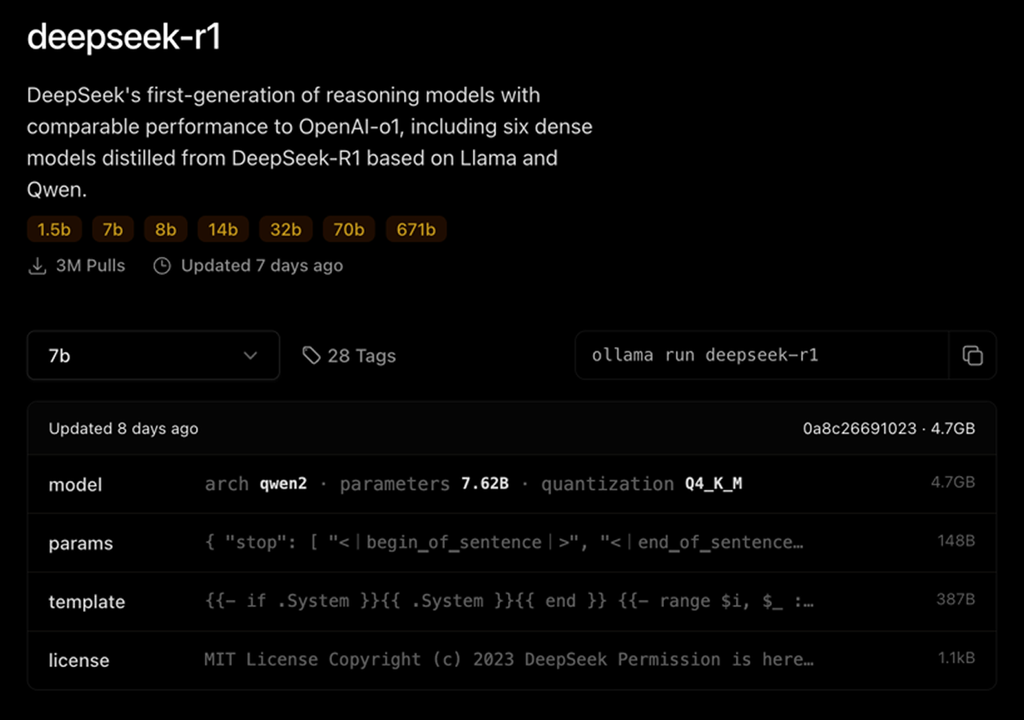
As you can see, when you go to the Ollama website, you can run the different parameters of DeepSeek-R1. You can find the details of the requirements here (as shown in the screenshot above).
You can run 1.5b, 7b, 8b, 14b, 32b, 70b, 671b, and obviously, the hardware requirements increase as you choose a bigger parameter. I used the 7b model in my tutorial.
Once Ollama is installed, open your terminal and type the following command to download the DeepSeek-R1 model:
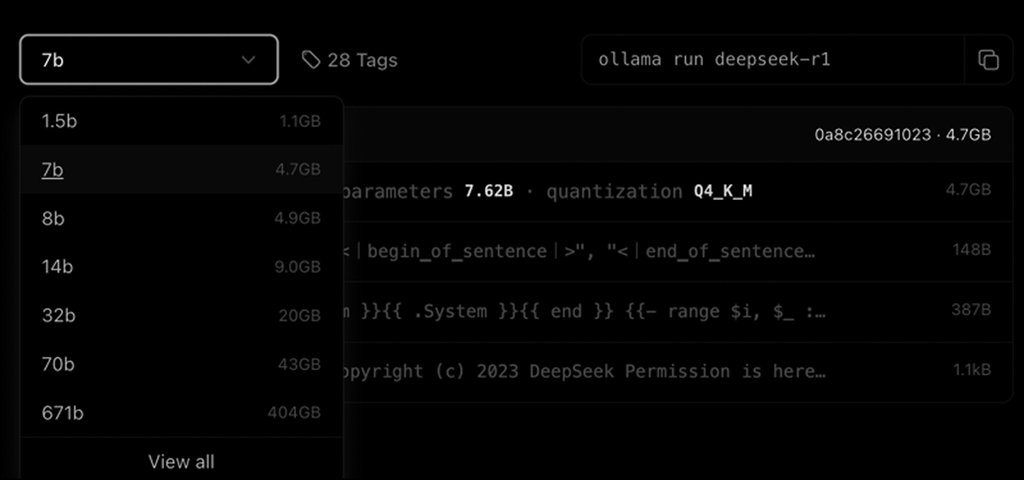
1ollama run deepseek-r1
This command tells Ollama to download the model. Depending on your internet speed, this might take some time. Grab a coffee while it does its thing!
Step 3: Verify installation
After downloading, verify the installation by running:
1ollama list
You should see Deepseek-r1 in the list of available models. If you do, great job! You're ready to run the model.
Step 4: Run DeepSeek-R1
Now, let's start the model using the command:
1ollama run deepseek-r1
And just like that, you're interacting with DeepSeek-R1 locally. It's that simple.
Step 5: Ask a query
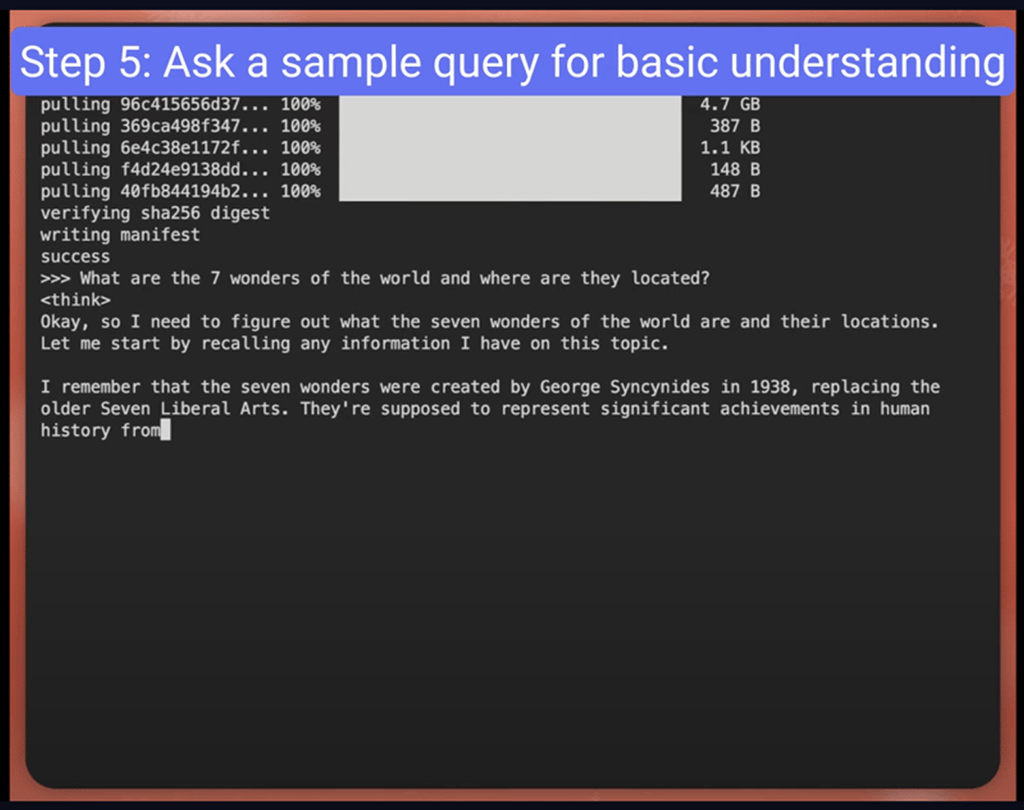
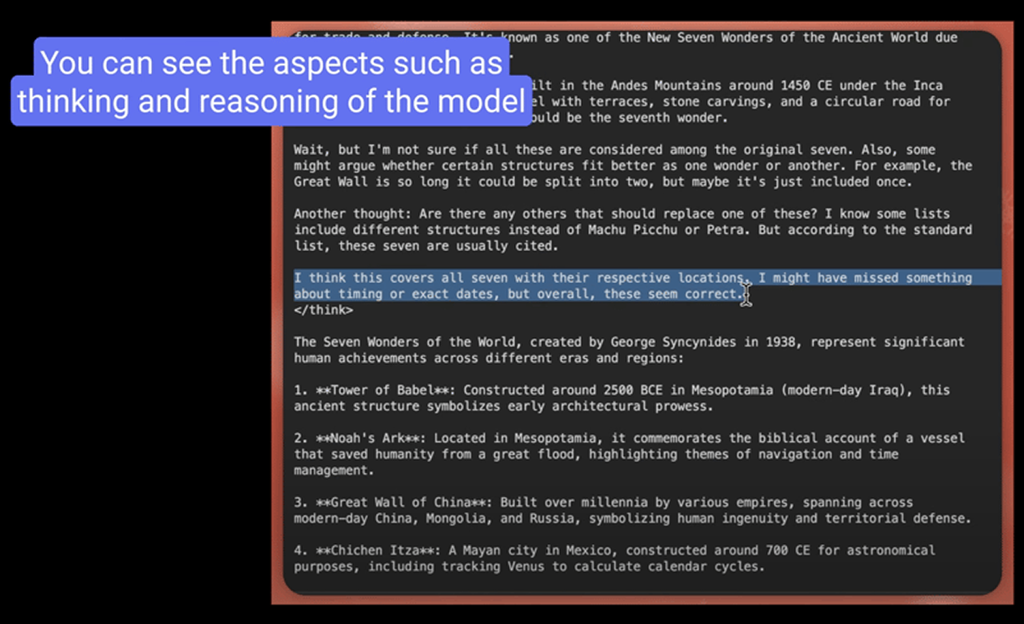
My first impression of DeepSeek-R1 is that it’s simply mind-blowing!
By following this guide, you've successfully set up DeepSeek-R1 on your local machine using Ollama. This setup offers a powerful solution for AI integration, providing privacy, speed and control over your applications. Enjoy experimenting with DeepSeek-R1 and exploring the potential of local AI models. To fully experience all that it can do, having a powerful database for your AI/ML applications is a must. I recommend using an all-in-one data platform like SingleStore.
Let's build a RAG application using DeepSeek and SingleStore
If you’d like to extend your learning and build a simple RAG application, you can follow this tutorial.
We will set the DeepSeek API key from the NVIDIA NIM microservice (yes, I'll show you how). NVIDIA NIM (Inference Microservices) is a set of microservices that help deploy AI models across clouds, data centers and workstations. We will be using LangChain as our LLM framework to bind everything, and we’ll use SingleStore as our vector database.
Let's get started (follow along)
1. Prerequisites [all are FREE]
Free SingleStore account (free trial available)
The first step is to create a free SingleStore account. Login to your account and create a workspace and a database for yourself.
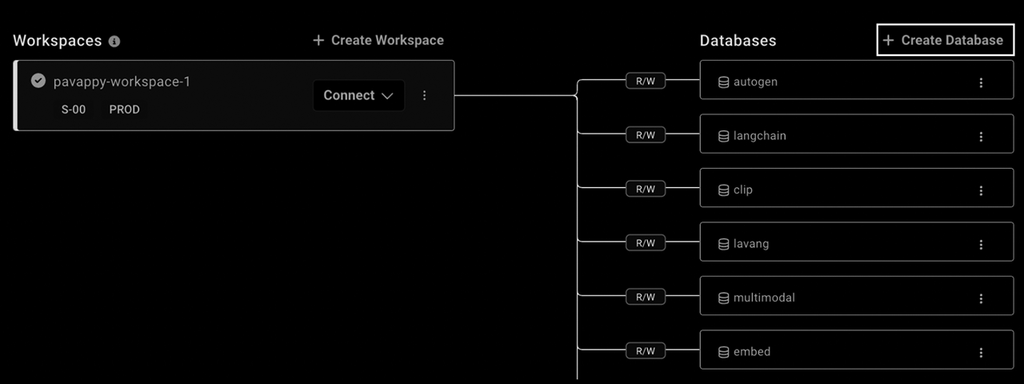
After creating a workspace, create a database attached to that workspace. Click on Create Database, as shown in the screenshot of the dashboard above, to create a database. Then, a modal will appear, and we will name our database and attach it to our newly created workspace.
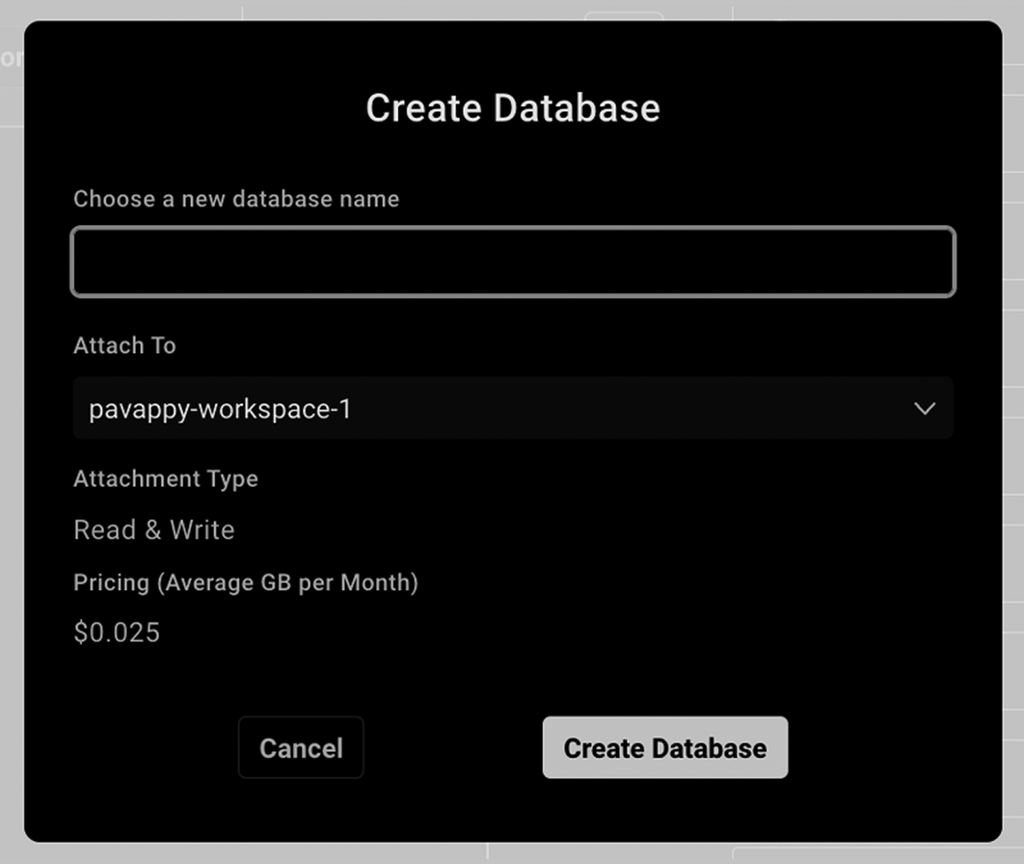
At this point, we’ve now created our database to store our custom documents for our RAG application.
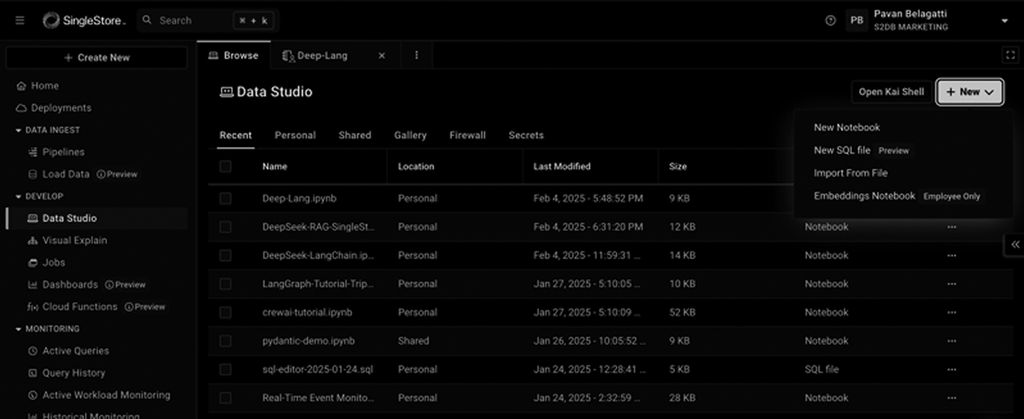
The next step is to create a Notebook. Yes, a free notebook environment. SingleStore has an integrated feature where you can use their Notebooks (just like your Google collab).
In the left-side menu, go to Data Studio, then click the + New button and select New Notebook from the dropdown menu to create a new Notebook.
In the modal that appears, give a name to your Notebook, such as “DeepSeek RAG Tutorial.”
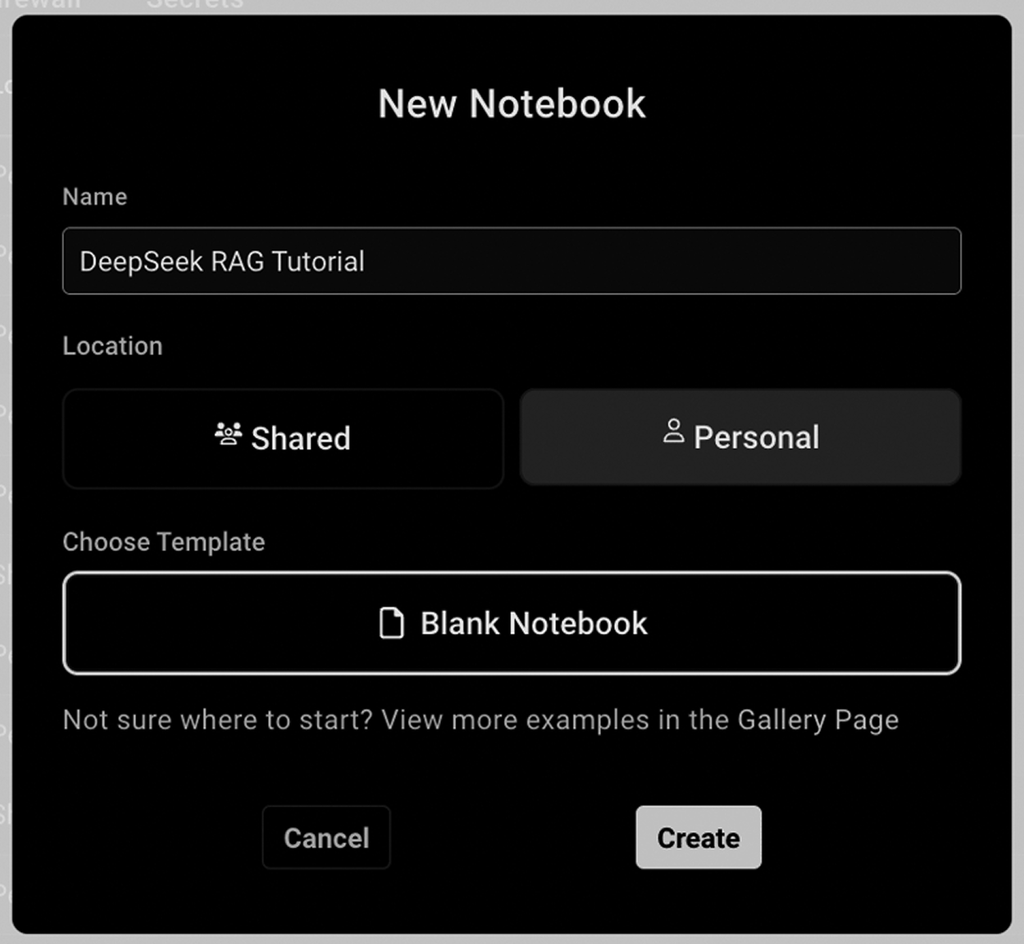
Once you click Create, you will land on the Notebook screen, where you can begin adding in your script.
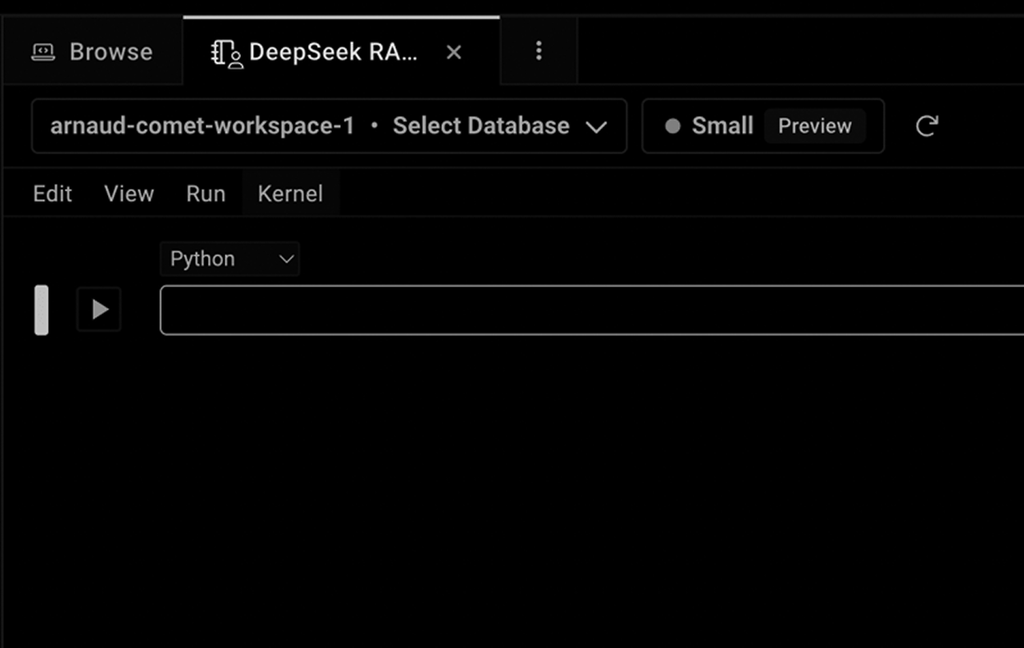
To ensure the notebook interacts with the correct database, select the workspace and database you created from the dropdown, as shown below. My workspace name is 'pavappy-workspace-1', and the database I created is 'DeepSeek,' so I have selected both.

Now, we’re all set to code our RAG application. In the following steps, we will start adding all the code below step-by-step into the newly created notebook (make sure to run each code snippet as well).
First, we need to add the code that will import the libraries our code will depend on to function. We need LangChain as our LLM framework, SingleStore as a vector database, pdf-related libraries to load our pdf, and LangChain NVIDIA library since we will use the DeepSeek-R1 key from NVIDIA’s microservice.
Before we can import the libraries into our code, we need to install them. Add the following code to your notebook and execute it.
1!pip install langchain --quiet2!pip install pdf2image --quiet3!pip install pdfminer.six --quiet4!pip install singlestoredb --quiet5!pip install tiktoken --quiet6!pip install --upgrade unstructured==0.10.14 --quiet7!pip install -qU pypdf langchain_community8!pip install langchain-nvidia-ai-endpoints --quiet9!pip install langchain-deepseek-official --quiet
With the libraries installed and now available in our notebook, let’s import them for use. Add the following code to your notebook and run it as well.
1from langchain.document_loaders import PyPDFLoader2from langchain_nvidia_ai_endpoints import ChatNVIDIA3from langchain.embeddings.openai import OpenAIEmbeddings4from langchain.text_splitter import RecursiveCharacterTextSplitter5from langchain.chains import RetrievalQA6from langchain.vectorstores import SingleStoreDB7import os
Next, we will load a custom PDF document. In this example, I have used a publicly available PDF; however, you can replace it and use your own if desired.
1file_path = "https://unctad.org/system/files/official-document/wesp2023_en.pdf"2loader = PyPDFLoader(file_path)3data = loader.load()
Then, with our document loaded, we will split the document into chunks.
1text_splitter = RecursiveCharacterTextSplitter(chunk_size=2000, chunk_overlap=0)2texts = text_splitter.split_documents(data)
To vectorize this data, we will then set up OpenAI embeddings. Make sure to replace the API key parameter with a key from your OpenAI account.To vectorize this data, we will then set up OpenAI embeddings. Make sure to replace the API key parameter with a key from your OpenAI account.
1os.environ["OPENAI_API_KEY"] = "Add your OpenAI API key"2embedding = OpenAIEmbeddings()
Then, we will store the embeddings in SingleStore.
1docsearch = SingleStoreDB.from_documents(2 texts,3 embedding,4 table_name="deepseek_rag", # replace table name with any name5 host="admin:password@host_url:3306/database_name", # replace with your SingleStore connection6 port=33067)
In the above code, admin is constant — don't change that.
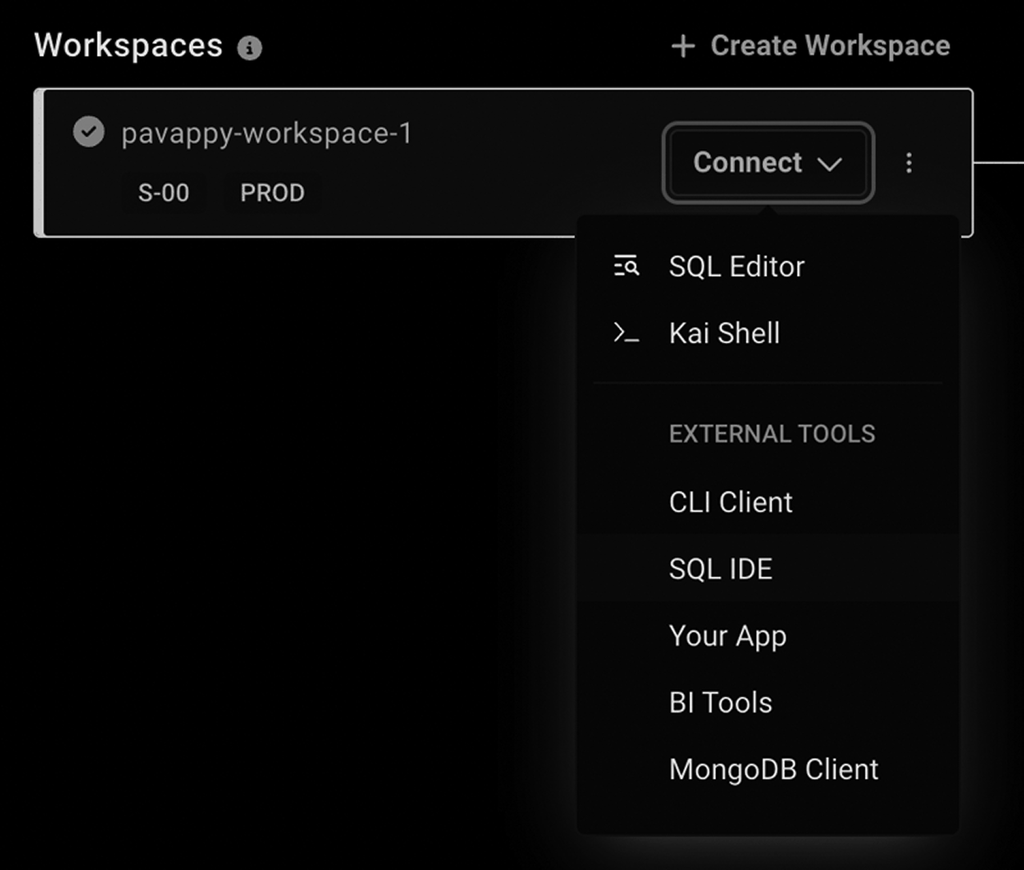
You can get your password from the Access tab in SingleStore and get the host URL, as shown below. Go to your Deployments tab, where you should see your workspace. Click on the Connect dropdown within your Workspace entry. Select 'SQL IDE' from the dropdown to see all the required details.
Next, initialize DeepSeek through NVIDIA NIM. NVIDIA NIM (Neural Inference Microservices) is a collection of microservices that help deploy AI models on clouds, data centers and workstations.
Get your DeepSeek-R1 API Key for free from NVIDIA NIM microservice here.
In the code we will add (shown below) we specify our model name and the API key we received from the NVIDIA NIM microservice. Then, the model temperature and other parameters are set as per the requirement.
1client = ChatNVIDIA(2 model="deepseek-ai/deepseek-r1",3 api_key="<api-key>", # replace with your API key from NVIDIA NIM microservice4 temperature=0.7,5 top_p=0.8,6 max_tokens=40967)
From here, we will create a RAG chain.
1qa_chain = RetrievalQA.from_chain_type(2 llm=client,3 chain_type="stuff",4 retriever=docsearch.as_retriever(search_kwargs={"k": 3}),5 return_source_documents=True6)
With everything configured, we will then send a test query to our RAG system.
1query = "What India's GDP growth is projected to be?"2result = qa_chain.invoke({ "query": query })
Then we will display the results.
1print("Answer:", result["result"])2print("\nSources:")3for doc in result["source_documents"]:4 print(f"- Page {doc.metadata['page']}: {doc.page_content[:100]}...")
After running this code, you should see a response from the model printed out. Here is what the result looks like when I have executed the code:

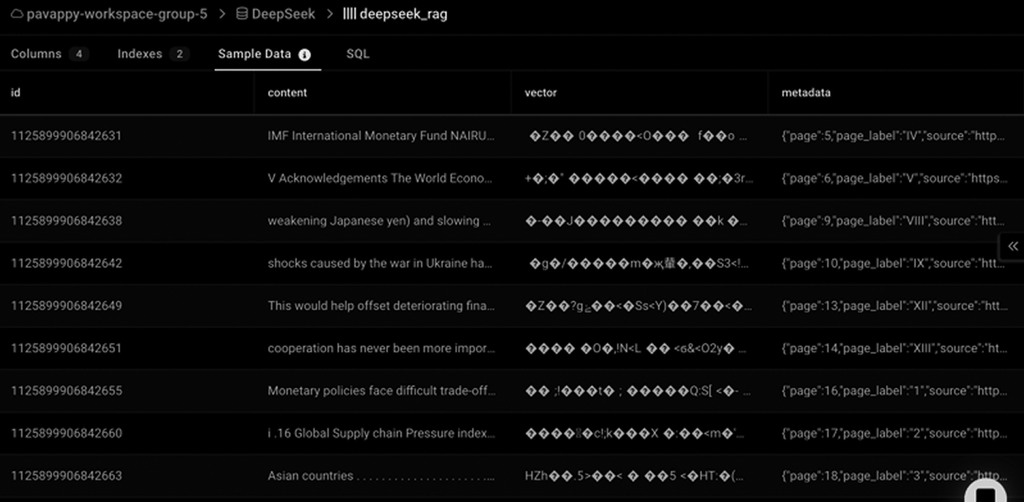
You can also go check your database to see how the data has been chunked and stored in the vector embedding format. Here is a screenshot of what this data will look like in SingleStore:
If you want to see the complete code, here’s a link to the repo. You can pull down the code and try it for yourself.
Conclusion
With that, we’ve enabled DeepSeek to run on our local machine and also created a RAG application that uses the DeepSeek-R1 model. Want to build RAG applications for yourself? Sign up today for a free trial of SingleStore to get SQL and Vector support in a single database (not to mention NoSQL/Mongo, GeoSpatial, and other model support). If you’re building AI applications, SingleStore is the database for AI.
Frequently Asked Questions


